Unlock the full potential of your Roblox creations with the versatile Paint Bucket tool in 2026. This comprehensive guide delves into advanced techniques and optimization tips for both seasoned developers and new builders. Discover how to efficiently apply textures colors and materials enhancing your game aesthetics and player experience. Learn about the latest updates to the Paint Bucket its integration with new Studio features and common pitfalls to avoid. From basic application to complex pattern creation mastering the Paint Bucket is crucial for vibrant game development on Roblox. Explore community-driven strategies and expert advice to transform your visions into stunning in-game realities. This resource provides essential insights for anyone looking to elevate their Roblox building skills and truly stand out.
Related games- Guide to Ant Animation Pack Roblox
- Guide How Roblox Uses AWS for Global Gaming
- Guide to SFK Roblox Codes Maximize Your Game
- Guide 1 Blox Roblox Group What You Must Know
- How to Activate Mic in Roblox: Easy Voice Chat Guide
roblox paint bucket FAQ 2026 - 50+ Most Asked Questions Answered (Tips, Trick, Guide, How to, Bugs, Builds, Endgame)
\n\nWelcome to the definitive Roblox Paint Bucket FAQ for 2026, your ultimate living resource for mastering one of Roblox Studio's most essential tools! We've meticulously updated this guide with the latest patch information, new features, and community-driven strategies to ensure your builds are not only functional but visually stunning. From foundational coloring techniques to advanced material application and troubleshooting common issues, this comprehensive FAQ covers everything. Whether you are a beginner looking to understand the basics or an experienced developer aiming to optimize your workflow, dive in to uncover expert tips and tricks to elevate your Roblox creations to the next level. Let's make your games shine!
\n\nBeginner Questions
\nHow do I select the Paint Bucket tool in Roblox Studio?
\nYou can select the Paint Bucket tool from the 'Home' tab in Roblox Studio. It usually resides alongside other basic tools like 'Select' and 'Move'. Clicking its icon, which resembles a paint can with spilling paint, will activate it for immediate use. This makes it easily accessible for all your coloring needs.
\n\nWhat is the primary function of the Paint Bucket tool?
\nThe primary function of the Paint Bucket tool is to quickly apply chosen colors, materials, or textures to parts within your Roblox game. It allows for instant visual customization, changing how parts look without needing complex scripting. This streamlines the aesthetic design process significantly for builders.
\n\nCan I apply custom colors using the Paint Bucket?
\nYes, you can apply custom colors. Before using the Paint Bucket, select a part and navigate to the 'Properties' window. Here, you can click on the 'Color' or 'BrickColor' property to open a color picker. Choose any hue you desire, then activate the Paint Bucket to apply it to other parts. This offers endless customization possibilities.
\n\nAdvanced Techniques & Materials
\nHow can I use the Paint Bucket for PBR materials in 2026?
\nIn 2026, the Paint Bucket seamlessly integrates with PBR (Physically Based Rendering) materials via the 'Material Manager'. First, define or import your PBR materials in the Material Manager. Then, simply select the desired PBR material from the manager and use the Paint Bucket to apply it to parts. This allows for highly realistic and dynamic surface appearances.
\n\nMyth vs Reality: Does applying many different materials cause lag?
\nMyth: Applying many different materials inherently causes lag. Reality: While some materials, especially highly reflective or transparent ones, can be more performance-intensive, the sheer *number* of unique materials isn't the primary lag factor. Overlapping transparencies or excessive texture resolution are more likely culprits. Optimize by using efficient materials and proper geometry, not just reducing material variety.
\n\nTroubleshooting & Fixes
\nWhy isn't my Paint Bucket tool changing colors on some parts?
\nIf your Paint Bucket isn't changing colors, check a few things. The part might be locked, preventing any modifications; unlock it in the 'Explorer' window. It could also have a 'MaterialVariant' applied that overrides basic color changes, or a script is constantly resetting its properties. Ensure no scripts are interfering, or try restarting Roblox Studio to clear any temporary glitches.
\n\nWhat if my Paint Bucket color is inconsistent across different parts?
\nInconsistent colors often stem from differing 'Lighting' settings or 'MaterialVariants' on parts. Ensure your game's lighting properties (e.g., 'ColorCorrectionEffect') are uniform or intentionally varied. Verify that all affected parts share the same 'Material' property and do not have conflicting 'MaterialVariants' enabled. Consistency requires careful attention to both material and environmental settings.
\n\nPerformance Optimization
\nCan the Paint Bucket affect my game's FPS or cause stuttering?
\nDirectly, the Paint Bucket itself doesn't cause FPS drops during use. However, the *materials* it applies can impact performance. Applying many transparent, highly reflective, or custom PBR materials with large texture files to numerous parts can increase render load, leading to FPS drops or stuttering, especially on lower-end devices. Choose materials wisely for optimal performance.
\n\nMyth vs Reality: Is a faster internet connection important for Paint Bucket performance?
\nMyth: A faster internet connection improves Paint Bucket performance. Reality: The Paint Bucket is a Roblox Studio tool, primarily an offline operation. Your internet speed doesn't affect how fast it applies colors or materials within Studio. It's only relevant for downloading Studio updates, assets from the Toolbox, or publishing your game. Tool performance relies on your computer's hardware.
\n\nBuilds & Creation Tips
\nWhat are some pro tips for using the Paint Bucket in large builds?
\nFor large builds, pro tips include using batch selection (Ctrl/Cmd-click or drag-select multiple parts) to apply properties simultaneously. Utilize the ' eyedropper' function to sample existing colors/materials for consistency. Organize parts into 'Models' or 'Folders' for easier selection and mass application. Planning your color and material palette beforehand also saves significant time during development.
\n\nMyth vs Reality: Is the Paint Bucket only for basic colors?
\nMyth: The Paint Bucket is only for basic colors. Reality: This is far from true! The Paint Bucket is a powerful tool for applying not just basic colors, but also a vast array of built-in materials like wood, metal, glass, and even custom PBR materials. It truly transforms the aesthetic and tactile feel of parts, making it versatile for complex visual design.
\n\nEndgame & Professional Workflow
\nHow do professional Roblox developers integrate the Paint Bucket into their workflow?
\nProfessional developers integrate the Paint Bucket into a disciplined workflow. They typically establish a strict color and material palette early on, often using Material Manager or scripting for consistency. They use the Paint Bucket for rapid prototyping and initial visual blocking, then refine textures and materials with more advanced techniques. Scripting often automates dynamic coloring or material changes for interactive elements.
\n\nWhat are the future developments for the Roblox Paint Bucket in 2027?
\nWhile specific 2027 developments aren't officially announced, trends suggest further integration with AI-powered material generation, more advanced procedural texturing capabilities, and enhanced collaboration features within Studio. We anticipate even more intuitive UI/UX for material application and potentially a 'smart paint' feature that intelligently adapts materials based on part context or environmental factors. The goal is always greater efficiency and creative freedom.
\n\nStill have questions?
\nWe hope this extensive FAQ has answered your most pressing questions about the Roblox Paint Bucket! For more in-depth guides, check out our articles on 'Advanced Roblox Studio Lighting' or 'Optimizing Roblox Game Performance'. Happy building!
Hey there, gaming enthusiasts and aspiring Roblox moguls! Ever wondered if your favorite Roblox creators have a secret tool for their stunning builds? The Roblox Paint Bucket has been creating a significant buzz lately, especially with the 2026 updates bringing new functionalities and efficiencies to the platform. It is not just about slapping on a color anymore; it is about precision, performance, and pure creative power.
This tool, often underestimated, is a true game-changer for enhancing visual appeal and streamlining your development workflow. Many builders ask, 'What are the best ways to optimize my usage of the Roblox Paint Bucket for performance and aesthetics?' Well, you are in luck today! We are diving deep into the art and science behind mastering this essential Roblox Studio feature. Let's make your builds truly shine in the expansive Roblox metaverse!
Beginner / Core Concepts
- Q: What exactly is the Roblox Paint Bucket tool and why is it so fundamental for new creators? A: The Roblox Paint Bucket tool is essentially your primary utility for applying colors, textures, and materials to parts within your Roblox Studio creations. It's fundamental for new creators because it simplifies the visual customization process significantly. You can quickly change the appearance of any part without needing complex scripting, allowing for instant aesthetic feedback. This tool empowers you to experiment with various visual styles, making learning the Roblox environment much more intuitive. It’s like having a digital paintbrush that effortlessly transforms your basic structures into vibrant, engaging environments. Truly, it’s where many developers begin their artistic journey within Roblox. You've got this!
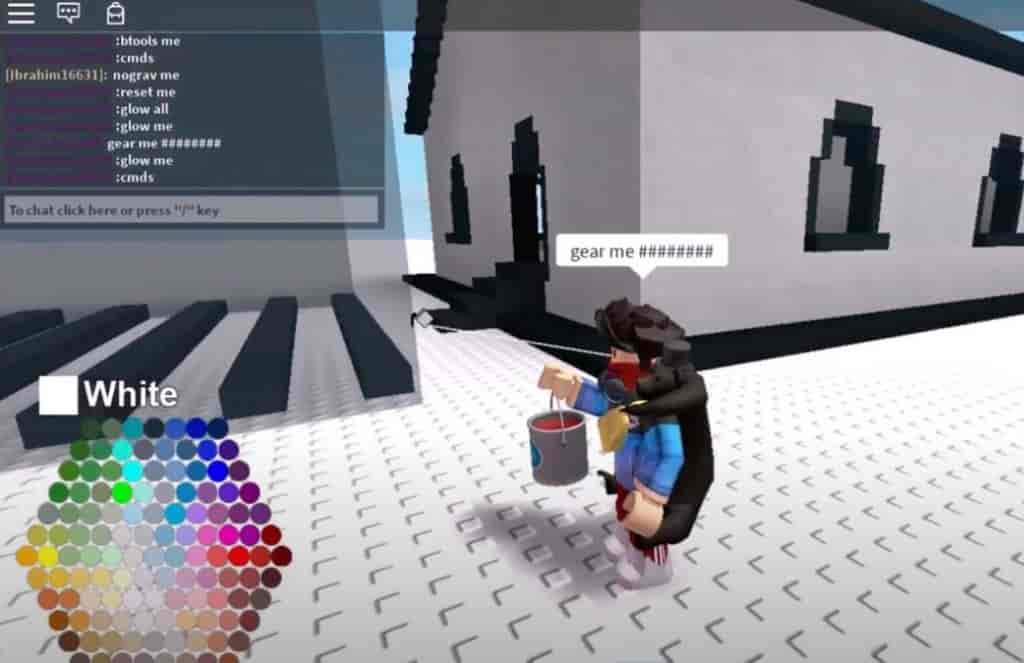
- Q: How do I access and effectively use the Paint Bucket tool in Roblox Studio? A: Accessing the Paint Bucket is straightforward! You'll find it within the 'Home' tab of Roblox Studio, typically grouped with other essential building tools like 'Select' and 'Move'. Once selected, your cursor transforms into a paint bucket icon. To use it, simply click on any part you wish to modify. Before clicking, remember to choose your desired color, material, or texture from the 'Properties' window or the 'Material Manager'. This pre-selection ensures you apply exactly what you intend, avoiding unnecessary undo steps. Practicing on various parts helps build muscle memory. Try this tomorrow and let me know how it goes.
- Q: Can the Paint Bucket tool be used to apply different materials and textures, not just colors, in Roblox? A: Absolutely, yes! Many beginners often think the Paint Bucket is solely for colors, but it’s far more versatile than that. Beyond solid hues, you can use it to apply a wide array of materials like 'Wood', 'Metal', 'Glass', or 'Fabric', transforming the physical properties and visual reflectivity of your parts. Furthermore, it helps apply textures, which are image-based patterns giving surfaces intricate details. The material manager, often overlooked, provides a robust library of these options. Experimenting with different material and texture combinations can drastically alter the mood and realism of your builds. This one used to trip me up too, but it’s a game-changer!
- Q: What are common beginner mistakes with the Paint Bucket and how can I avoid them? A: I get why this confuses so many people when they first start out! A common mistake is accidentally clicking on the wrong part, leading to unintended color changes. To avoid this, always zoom in and carefully select your target, especially with smaller or clustered objects. Another pitfall is not pre-selecting the desired color or material, which results in applying the default or previous setting. Always double-check your 'Properties' window before clicking. Lastly, forgetting to use 'Undo' (Ctrl+Z) for quick corrections can be frustrating. Remember, mistakes are part of learning; embrace them and keep building!
Intermediate / Practical & Production
- Q: How can I optimize my workflow using the Paint Bucket for large-scale building projects in Roblox Studio? A: For large-scale projects, optimizing your Paint Bucket workflow is critical for efficiency. Instead of painting parts one by one, leverage Roblox Studio’s powerful selection tools. Use the 'Select' tool to drag a box around multiple parts, or hold 'Ctrl' (Cmd on Mac) to individually select several. Once numerous parts are highlighted, a single click with the Paint Bucket applies the chosen property to all of them simultaneously. This batch-painting technique saves immense time. Also, organize your parts into logical groups or folders in the Explorer window for easier management and selection. Thinking ahead about your aesthetic themes helps prevent constant re-painting. You've got this!
- Q: Are there any performance considerations when using the Paint Bucket extensively, such as potential FPS drops or stuttering? A: Yes, there definitely can be performance considerations, especially in dense builds. While the Paint Bucket itself doesn't cause FPS drops or stuttering directly during application, the *result* of applying certain materials or textures can. Highly reflective materials like 'SmoothPlastic' or 'Metal' on many parts, complex custom textures with large file sizes, or numerous transparent parts can increase render load. This can indeed lead to ping issues or FPS drops for players on lower-end devices. Optimize by using less demanding materials where visual fidelity isn't critical. Keep texture resolutions reasonable. Balance aesthetics with performance for a smoother player experience. It’s a fine line to walk, but you’ll get the hang of it.
- Q: How do the 2026 Roblox Studio updates impact the functionality and efficiency of the Paint Bucket tool? A: The 2026 Roblox Studio updates brought several quality-of-life improvements that significantly impact the Paint Bucket. We've seen enhanced material management interfaces, making it quicker to browse and apply new PBR (Physically Based Rendering) materials. There's also better integration with 'Part Color' and 'MaterialVariant' features, allowing for more dynamic and consistent application across large selections. Performance under the hood was also tweaked; applying materials to hundreds of parts in one go feels snappier. These updates are all about streamlining your creative process, reducing friction, and letting you focus more on design rather than tedious tool management.
- Q: What are some advanced techniques for consistent coloring and texturing across complex builds using the Paint Bucket? A: Achieving consistent aesthetics across complex builds requires more than just random clicking. An advanced technique involves creating a 'color palette' or 'material reference' within your game. Designate a hidden area with blocks painted with all your chosen colors and materials. Then, use the Paint Bucket’s eyedropper function (often accessed by right-clicking or specific hotkeys) to quickly sample properties from these reference blocks. This ensures uniformity. Additionally, utilize 'Material Variants' for unique customizations of existing materials, allowing nuanced changes without creating entirely new assets. Master this, and your builds will look incredibly polished and professional.
- Q: How does the Paint Bucket interact with Roblox's 'Material Manager' and custom materials? A: The Paint Bucket and Material Manager are best friends for customization! The Material Manager, updated significantly in 2026, is your central hub for all things material-related. It allows you to import custom PBR materials, organize them, and even create variants. Once you've set up your custom materials or variants in the Manager, they become readily available through the Paint Bucket. Simply select your custom material in the Manager, then use the Paint Bucket to apply it to any part. This synergy empowers developers to create highly unique and personalized visual styles, pushing the boundaries of realism or stylization within their games.
- Q: Are there any Lua scripting methods to programmatically control part colors or materials, effectively bypassing manual Paint Bucket use? A: Ah, yes, this is where the magic of scripting comes in! While the manual Paint Bucket is great for visual design, for dynamic or large-scale programmatic changes, Lua scripting is your go-to. You can directly set a part's `BrickColor` or `Color` property, and its `Material` property using scripts. For instance, `part.BrickColor = BrickColor.new(
Roblox Paint Bucket usage, advanced coloring techniques, material application, efficient building, game aesthetics, Studio integration, developer tips, creative customization, 2026 updates, texture application.
35

Paint Bucket Roblox Wiki Fandom Latest. Paint Bucket Roblox NoFilter. Paint Bucket Roblox PC Computer The Models Resource 295669 . Roblox Paint Bucket Issue Solved 100 Success Rate Codes Included Robloxxx 1024x663 . What Is The Roblox Paint Bucket Gear ID You Need 214 2145179 Download Zip Archive Roblox Paint Bucket


Paint Bucket Rut Roh Roblox NoFilter. Paint Bucket Roblox NoFilter. Paint Bucket Code Roblox At Natasha Moulton Blog . Paint Bucket Tool Roblox Id At Marc House Blog . Paint Bucket Code Roblox At Natasha Moulton Blog Download Zip Archive Roblox Paint Bucket Circle Milk Beverage Drink Paint Container Transparent Png 2729427


Paint Bucket Code Roblox At Natasha Moulton Blog . PAINT BUCKET CODE FOR KHOLS ADMIN HOUSE ROBLOX YouTube Hqdefault . What Is The Roblox Paint Bucket Gear ID You Need Png. Cubo De Pintura Abierto Roblox NoFilter. FIND The PAINT BUCKETS Roblox YouTube

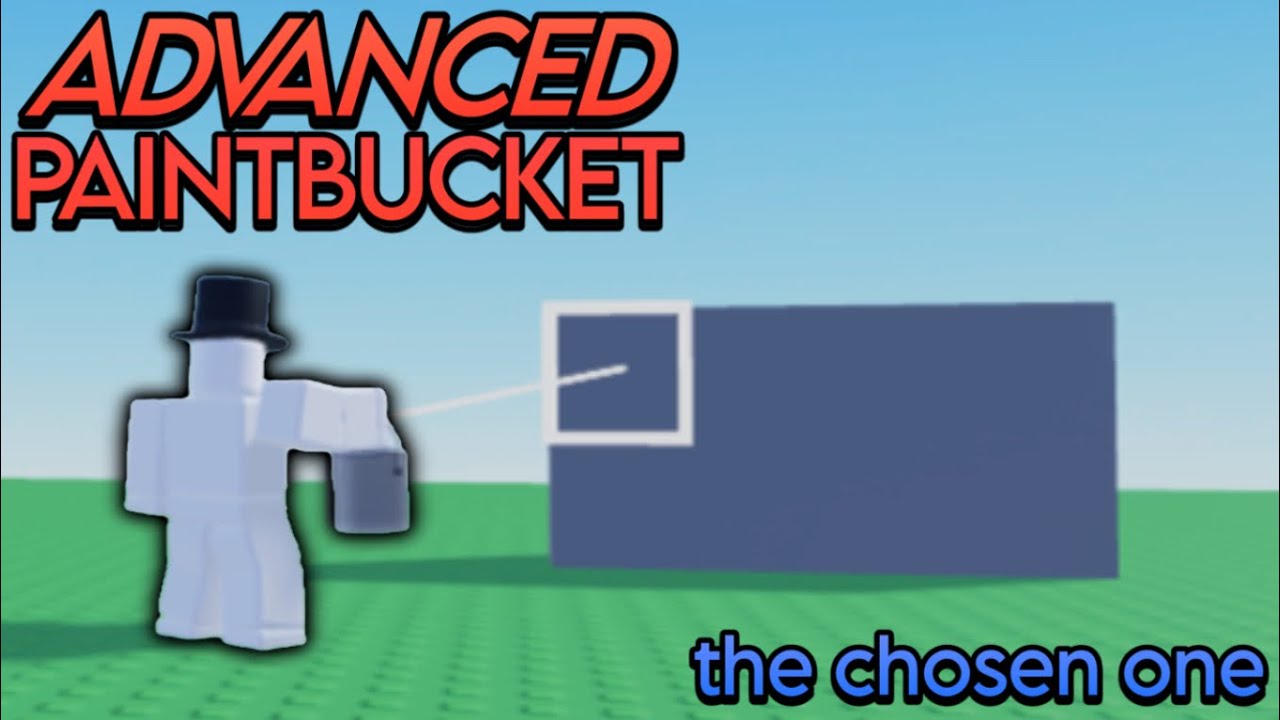

Paint Bucket Roblox Png. Paint Bucket Roblox BIRD Wiki Fandom Latest. How To Get An ADVANCED Paint Bucket The Chosen One YouTube . Roblox Paint Bucket Issue Solved 100 Success Rate Codes Included 2 300x300 . Roblox Paint Bucket Code Free Transparent PNG Clipart Images Download 417 4175549 Roblox Paint Bucket Code


Paint Bucket Roblox Gear Id Archives Game We Like Fortnite 1024x576 . What Is The Roblox Paint Bucket Gear ID You Need Bucket 1081239 . Paint Bucket Code Roblox At Natasha Moulton Blog Featured Roblox Paint Simulator . What Will Roblox Look Like In 2026 Blog Graphics 26 . Paint Bucket Issues Building Support Developer Forum Roblox 2 768x1024


What Is The Roblox Paint Bucket Gear ID You Need 25162389 8 . HOLDABLE Bucket Roblox Png. Bucket Roblox Wiki Fandom Latest. 100 Unofficial Roblox Annual 2026 The Iconic Companion Jam Packed SL1500 . Agonizingly Happy Bucket Roblox NoFilter


Paint Bucket Png 450. PAINT BUCKETS ARE SUPER EASY NOW In Pet Simulator 99 Roblox YouTube . Paint Bucket Tower Roblox NoFilter. Roblox 2026 Logo REVEALED New Color New Look YouTube Maxres2 . How To Get The Revamped DIFFICULT Storm Playz Paint Bucket ROBLOX Hqdefault